How to Paint Wood Siding
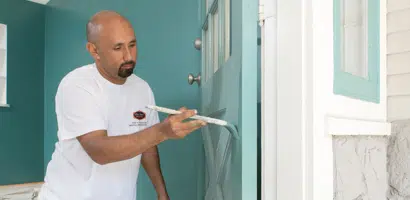
Professional painter Cole Schaefer shows you how to paint wood siding.
View Transcript
| Video/Text on-screen | Copy |
|---|---|
| Opening- Dunn-Edwards logo | [Music] |
| Man Talking | Hi. I'm Cole Schaefer, professional painter, and welcome to Dunn-Edwards paints “how to paint” video series. You know painting exterior wood siding usually involves a lot of preparation especially if your house has gone too long between paint jobs. If your home is very old with decades of built-up paint layers expect to spend a lot of time removing old paint. Skipping on preparation, not using primer and using lower quality paint will dramatically shorten the life of your paint job and compromise your home siding by allowing it to crack and rot. Look at exterior painting as a way of protecting your biggest investment, your home. In this video we will share tips on how to properly prep and paint your exterior siding, so you get the best results. So first you want to look at your project and make sure you have the skill capability and equipment to do it because painting exterior wood siding can be difficult depending on the existing condition of your home, you may want to consider hiring a professional painter to paint your house. Now if you do decide to do it yourself you need to know about the hazards of lead-based paint. If your home was painted prior to 1978 it may have been painted with lead-based paint. Contact the EPA's national lead information center at one eight hundred forty four LED or visit WWW Ford / lead for laws and procedures covering the removal and handling of lead paint. If you live in a newer home, lead-based paint is not a concern however, your project may involve power washing, scraping, sanding, and priming these are very important steps, as always, consult Dunn-Edwards surface preparation safety brochure before you get started. Now, let’s begin by checking the surface for chalkiness. Run your hand over the siding on the sunny side of your house, if a chalky residue comes off on your hand you may need to power wash the siding because this chalkiness will impair the paint adhesion. Now, you can rent a power washer from your local equipment rental yard. Be sure to have the rental yard staff explain how to use the power washer and provide basic safety training. Here's the tip on power washing, don't aim the water stream directly at the surface, instead, use it like a paint scraper aim at the siding at a 30 to 45 degree angle and slowly move it across the surface to remove any loose paint. Also, be sure to protect your home by carefully aiming the water stream away from windows doors or any openings this will help prevent getting water into any unwanted areas. |
| Sanding wall | Once the power washing is done you may need to remove any remaining paint with 80 grit sandpaper, then sand these areas again with the lighter 120 grit sandpaper to smooth out any rough surfaces or sanding marks. |
| Man Talking | These steps will provide a smooth surface and improves the adhesion of paint and primer so once all the prep work is done you'll want to prime all bare and expose siding with high-quality primer such as Dunn-Edwards EZ-PRIME Premium, which is an exterior acrylic primer that provides excellent hide and is ideal for wood siding. And once you finish priming there are a few more preparation steps to be done before you can begin painting. If any patching is required in the siding here's a tip- when patching all exterior projects, it's best to sandwich your patching compound between coats of primer or paint this encapsulates the patching compound and protects it from moisture damage. |
| Patching up wall | Use an exterior spackle paste to fill in any gouges or nail holes in the wood. Next, you'll want to caulk the joints and gaps between the siding and trim pieces. Now you're ready to start painting. |
| Man Talking | But before you start here's another painting tip, avoid painting and direct sunlight. If possible, wait for a time of day when the area to be painted is in the shade. Why? Well heat from the sun will increase the temperature of the surface. This surface temperature along with the ambient heat will make the paint you're applying dry faster and limit the amount of time you have to create a nice finish. Now you want to apply two coats of premium exterior paint once the primer has dried. |
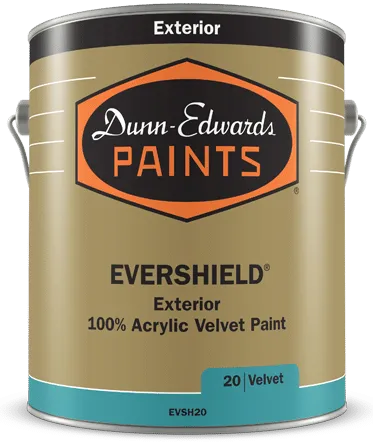
| Paint can clip | Dunn-Edwards EVERSHIELD ultra-premium exterior paint is great for wood siding |
| Man Talking | as it provides maximum protection against UV color fade, mildew, efflorescence, water intrusion, and film failures such as, grain cracking, peeling and blistering. The approach for painting the siding is to start on one side of the wall. Paint the trim then begin painting to the other side. Now keep in mind today's water-based dry quickly so use a paint roller to help apply the paint over a large area faster so you can keep a wet edge and brush out the paint for a smooth finish. |
| Painting wall | Start by using a brush to cut in the trim and then cut in any areas below drip or decorative moldings, then use your roller cover to apply the paint over a three to four foot section of siding. Once all the paint is applied go back and feather out the paint using your brush to get a smooth finish. Now work as quickly as possible as the paint will dry. |
| Man Talking | And once you've completed this section move on to the next three to four foot section and repeat the process. And when you've reached the other side, paint any trim pieces and you're done. Repeat this entire process on the rest of the siding on your home and you'll have a fresh new coat of paint that will protect the surface for years to come. To learn more about paint and painting, watch the other “how to paint” videos on dunnedwards.com/videos for Dunn-Edwards paints I'm Cole Schaefer thanks for watching and happy painting. |
| Closing- Dunn-Edwards logo | [Music] |


